

There are three roadbed sections that make up the hidden staging track area. The section is 5" wide. There will be two tracks on the board, separated by 2 1/2". I moved it to the front to make it easier to work on. Always make track laying as easy as possible. Since this area is hidden we have to pay extra attention to make sure everything is right and it runs flawlessly. A mistake here will break your back!

I'm going to use HO scale code 83 track from Walthers since I have a ton of it and track is getting hard to come by. No one will see it, and it is pretty high quality, so it will be great for this job. I start by drawing track centerlines from end to end, 1 1/4" away from the sides.

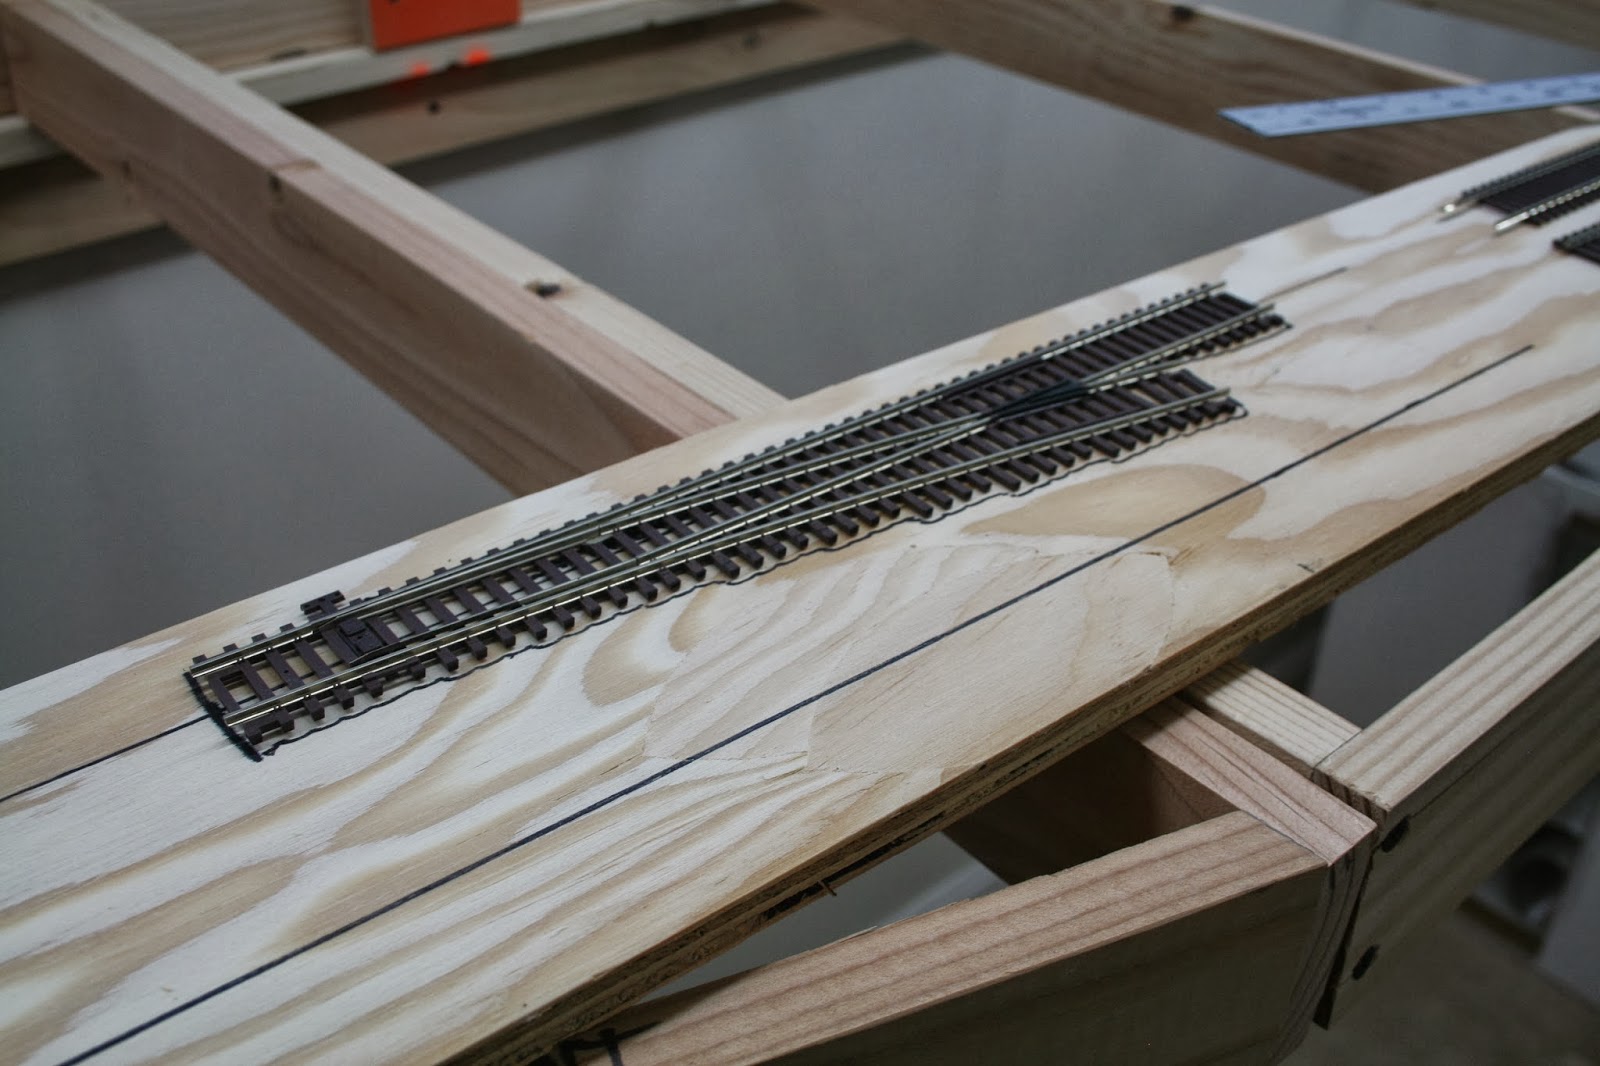
Once the centerlines are drawn I'll draw in the first turnout on the left end. I'm using a Walther's Code 83 #5 Right Hand turnout which will be electrically powered by a remote switch. The main line is on the left with a simple passing siding on the right
I just take a Sharpee marker and draw around it. Since it is powered by a Tortoise machine, I move the board back to where it will be and make sure I have clearance. It is fine, so I draw it in.

I places Atlas code 83 re-railers at every joint and in front of every turnout. Re-railers, wile they don't look prototypical, are an engineering marvel for hidden trackage. I recommend one at least every six feet in a hidden area to keep the trains on the track, especially at joints, turnouts and fouling points where cars can bump.

Here is the turnout and the rerailer. There is clearance from the switch points to the end of the track of 22" which is enough for one of my longest locomotives and one car to conduct a run around. You have to check stuff like this twice, so I did get out the locomotive and measure it and a boxcar.

I marked the center of the two rerailers and laid them across the divide between sections (this is not the area as I've moved the boards up front). These will NOT be glued down. Note that I have not put down the roadbed. I'll put down cork roadbed for sound deadening purposes. Trains underneath a scenery block are VERY noisy and this will keep them quiet.

The other joint gets the same attention.

The right hand side gets a Walthers 83 #5 as well and a re-rialer. The re-railer sticks out a bit over the end of the board because it will ride on a future board where the feeder turnout will be off the mainline. Everything remains loose and is just a place holder.

I've got track to build a small empire, but not one single bumper post. I'll have to go get one. This area will be where the cassette can load and unload cars to the layout, so the bumper is just to keep the trains from running wild and off the layout. If you have DCC you know EXACTLY what I mean!
Stay tune! We'll glue down the cork soon! We'll also put on guard rails to keep the trains on the track, idea courtesy of the legendary Popsicle Rick Wade!!!
No comments:
Post a Comment
Thanks for your comment!